This guide will help you with the installation and configuration of Windows Server Backup.
Step 1 #
Open menu start, type backup and press enter

Step 2 #
If your server doesn’t have an installed backup feature, you need to install it.

Step 3 #
Go to Server Manager and click Add roles and features

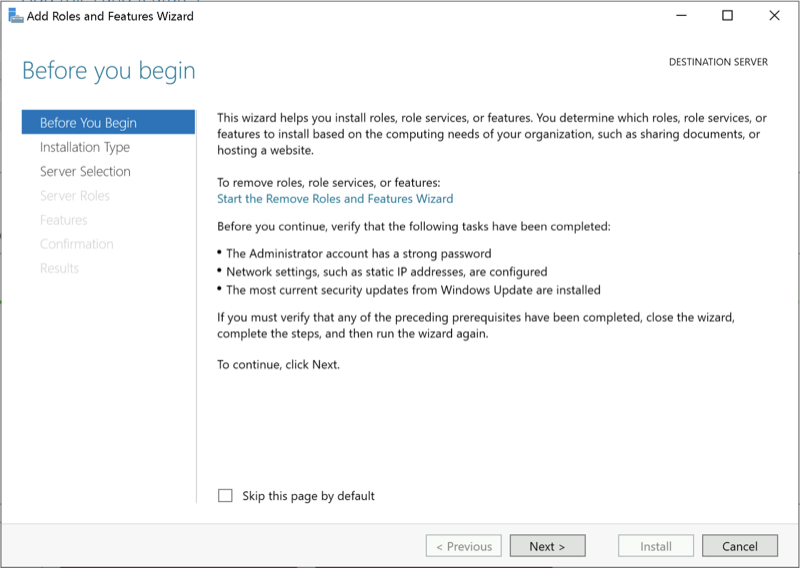
Step 4 #
Just click Next
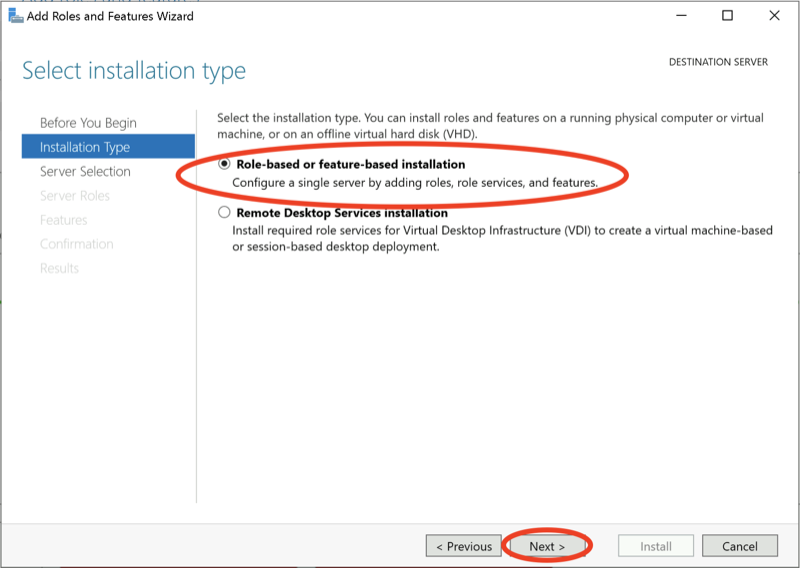
Step 5 #
Select role-based or featured-based installation and click next
Step 6 #
Select your desired server now:

Step 7 #
Skip role-based installation by pressing next:

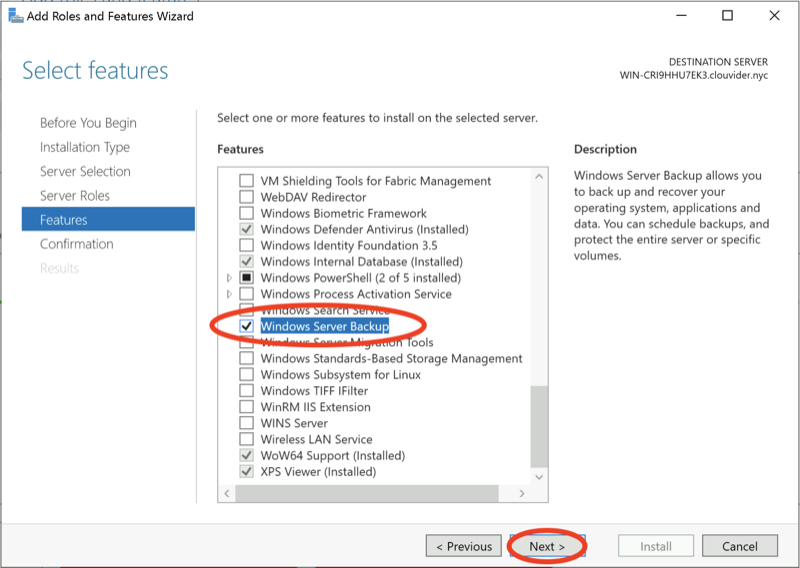
Step 8 #
Select Windows Server Backup:
Step 9 #
Check to Restart the destination server automatically if required and press next:

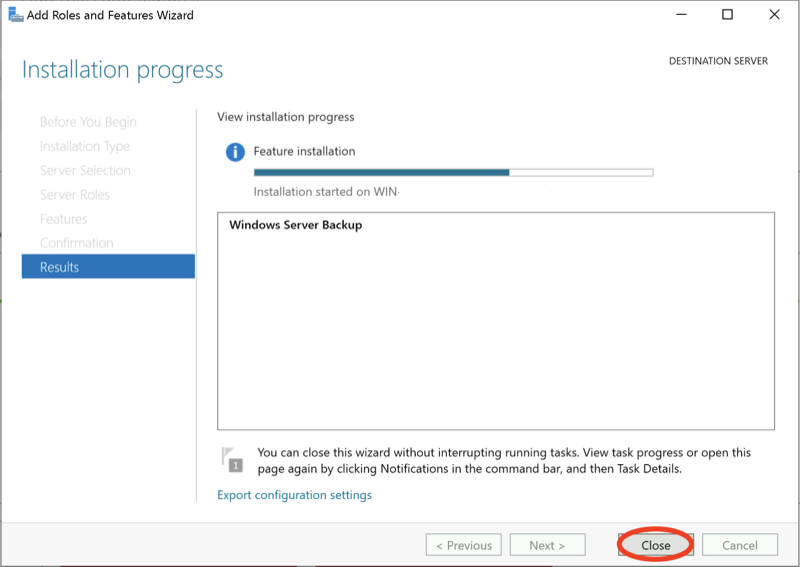
Step 10 #
After installation, press close.
Setup scheduled backup #
Step 1 #
Open schedule backup wizard:

Step 2 #
Click next:

Step 3 #
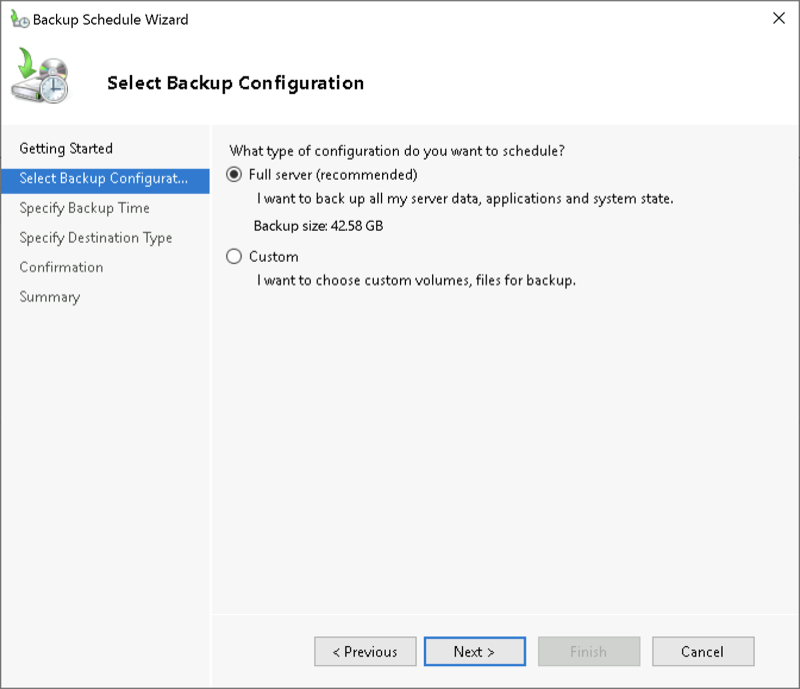
Configure your backup range:
Step 4 #
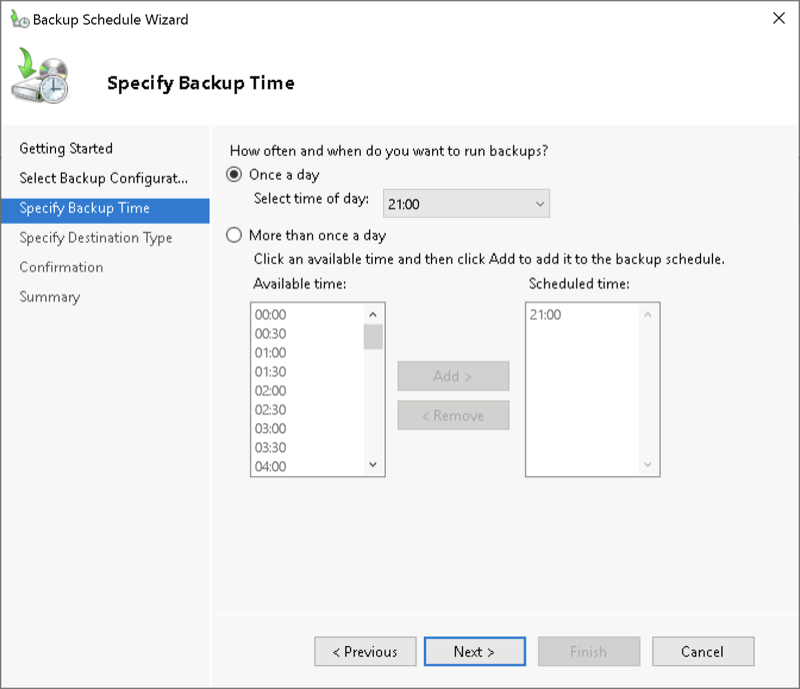
Configure backup time:
Step 5 #
Select the destination of your backup. We are using a remote destination for this guide:

Step 6
#
Specify the location of your backup:
Step 7 #
Fill credentials if required:

Step 8 #
Confirm your settings

Step 9 #
Check the summary of your backup settings
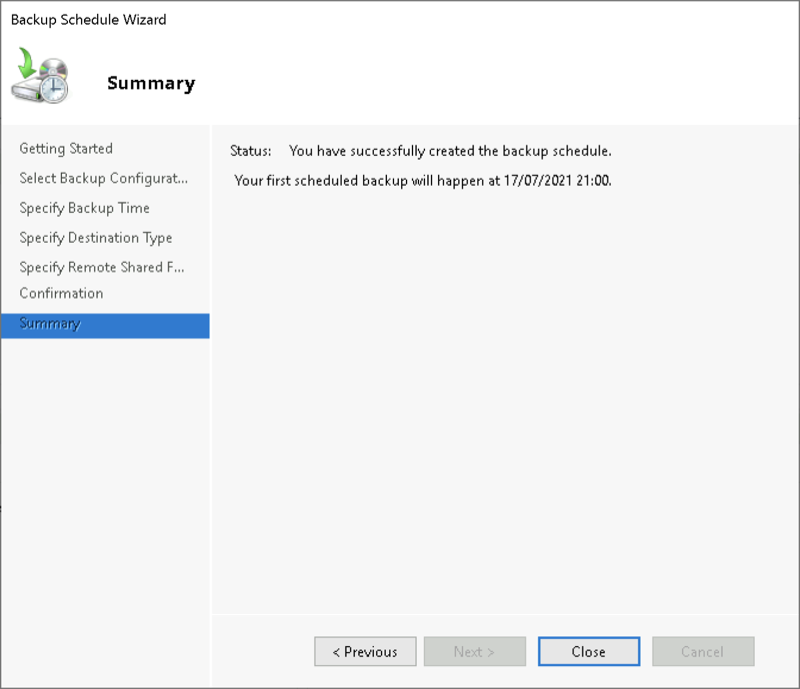
Now your backup has been scheduled and will run at desired time.


