Most virtual hypervisors (like Proxmox or VMWare) allow resizing VM storage on the fly.
However, if you don’t want to reboot your server while resizing, you can resize your root partition “live”.
Assuming your drive has been already resized on the hypervisor side (e.g. from 20GB to 40GB), you need to follow the following steps to ensure the OS knows about the increased storage capacity.
Step 1 #
Check your current partition size and drive by using df -h and fdisk -l /dev/sda command (assuming your drive is sda):
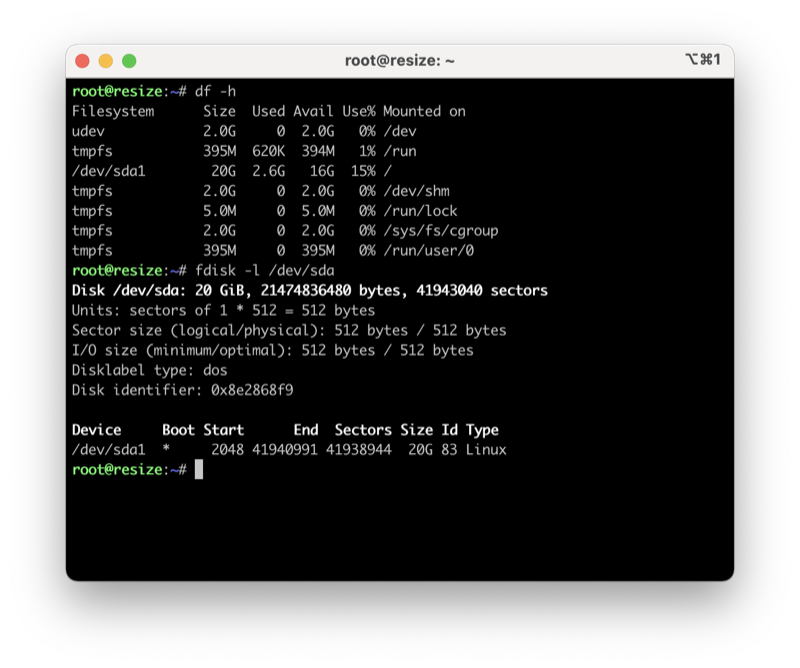
As you can see, the root partition / and the drive total capacity are around 20GB.
Step 2 #
Now you need to rescan your block device sda with the following command:
$ echo 1 > /sys/block/sda/device/rescan
And check again drive capacity by using fdisk -l /dev/sda command:
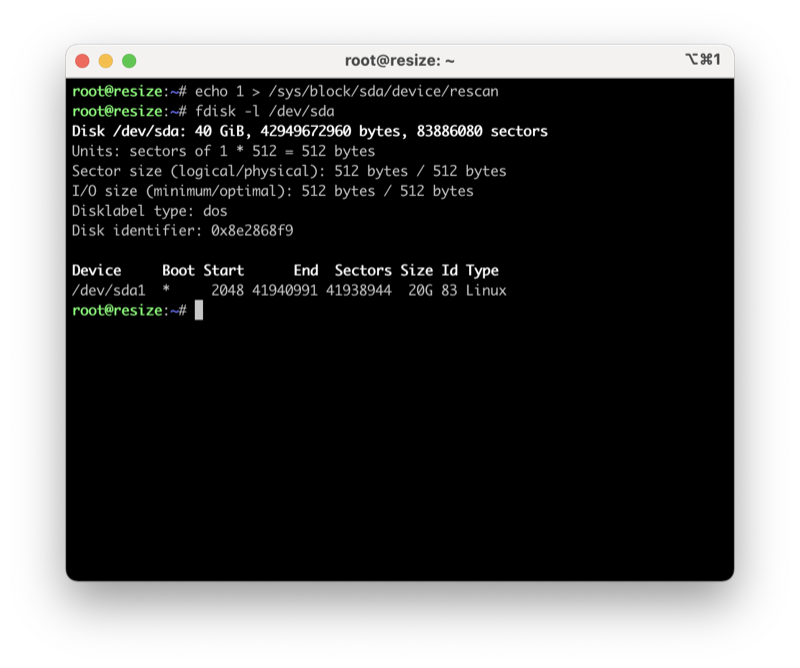
Now your drive has 40GB capacity, but your root partition still uses only 20GB. To resize the root partition, you need to run fdisk /dev/sda:
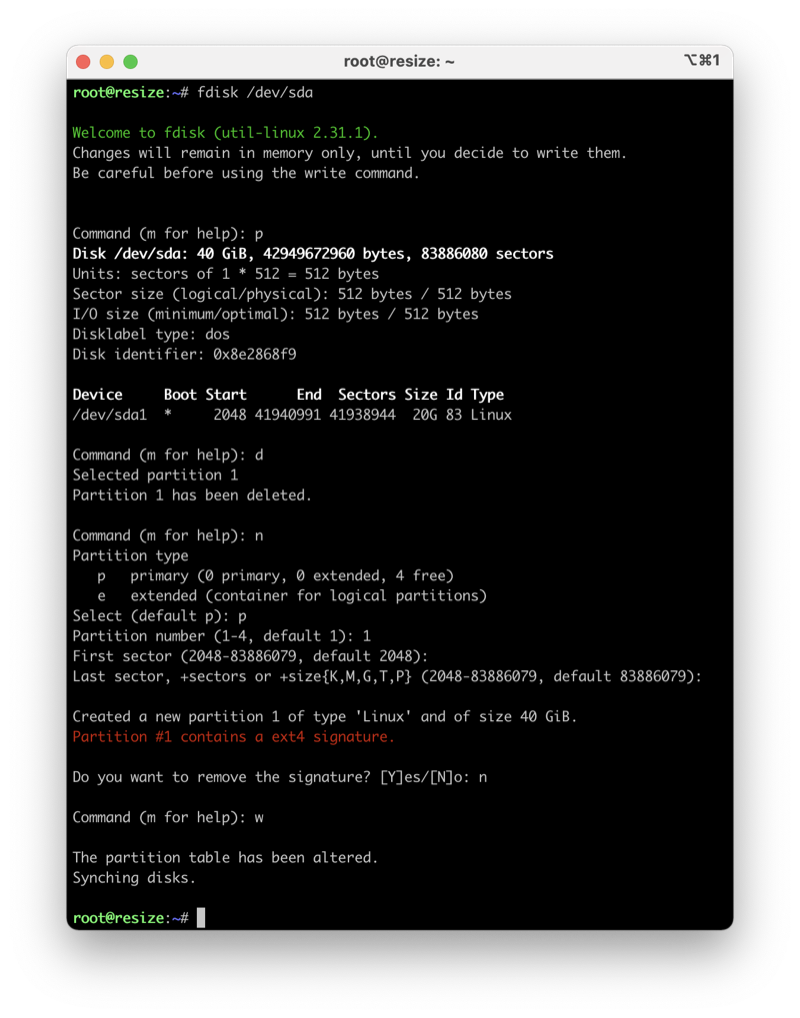
$ fdisk /dev/sda
Now press “p” to print the current partition layout.
This operation can be dangerous, so please follow the following steps with caution!
Step 3 #
Now delete your primary partition /dev/sda1 by pressing the d key.
Step 4 #
Create a new partition by pressing the n key and pressing 1 for the partition number.
Step 5 #
Use the default value of Fist sector and Last sector
Step 6 #
Do not remove the existing signature! Press n to avoid removal.
Step 7 #
: Now press the w key to save the partition table.
Step 8 #
Type resize2fs / command and check your current root patition capacity by using df -h:
$ resize2fs /
$ df -h
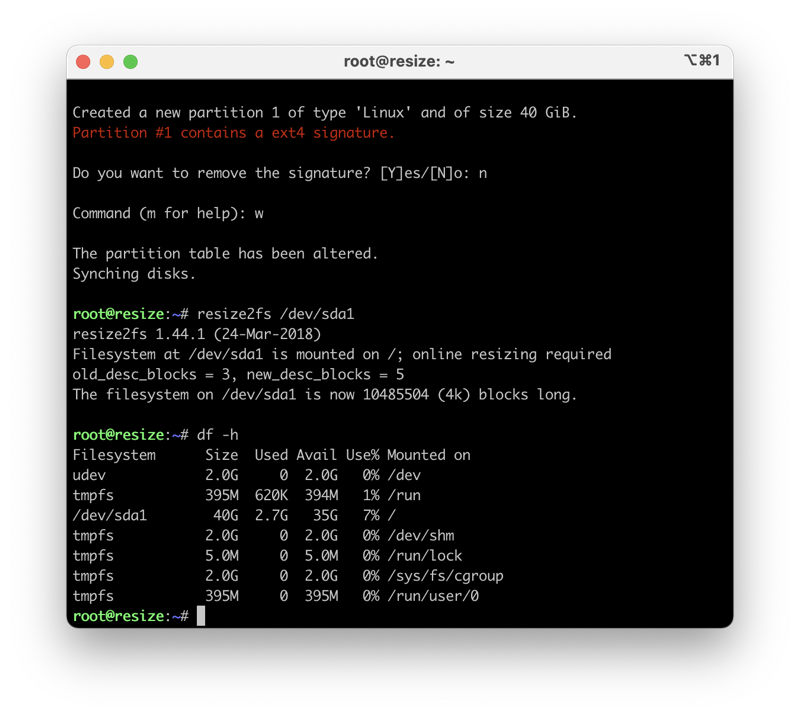
Your root partition / has been now resized.


